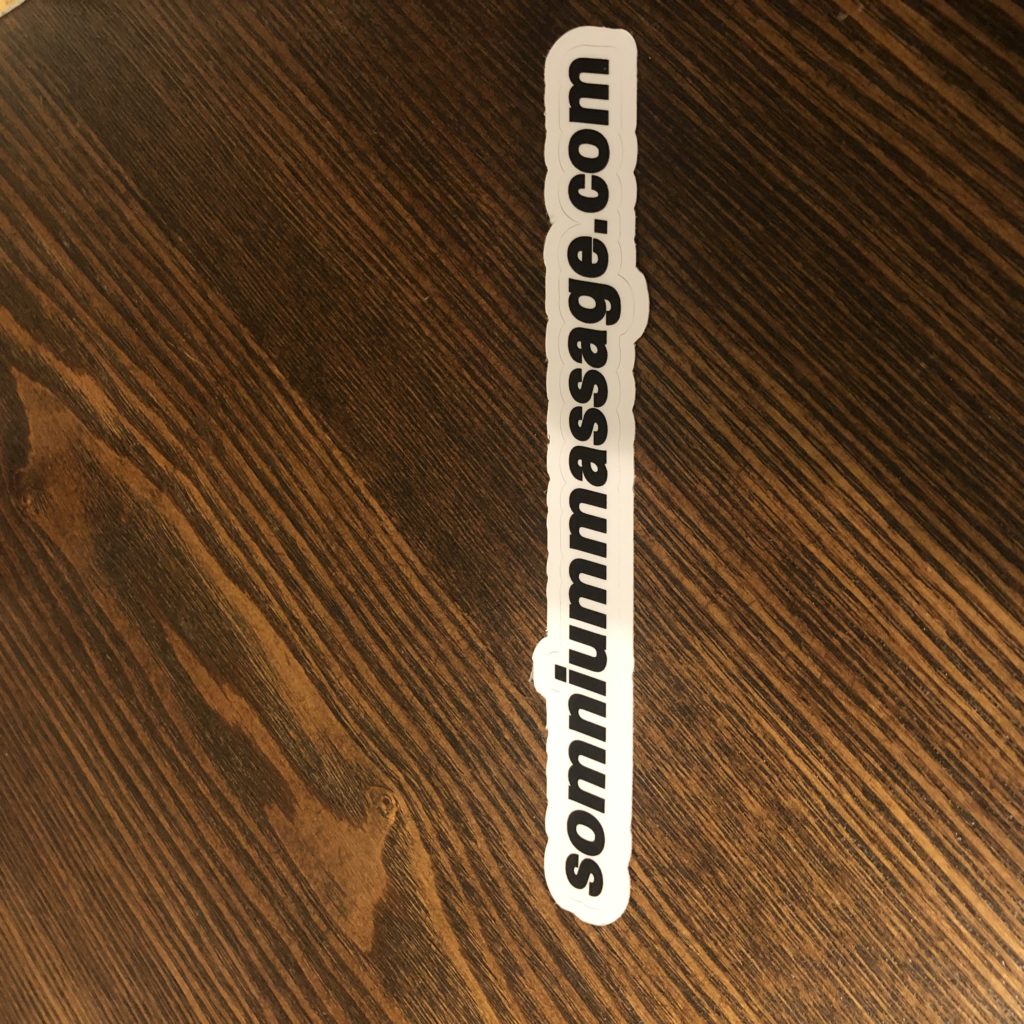
HUGE thanks to Essential Healing and Massage and Somnium Massage for the sponsorship!!
Thank you so much.
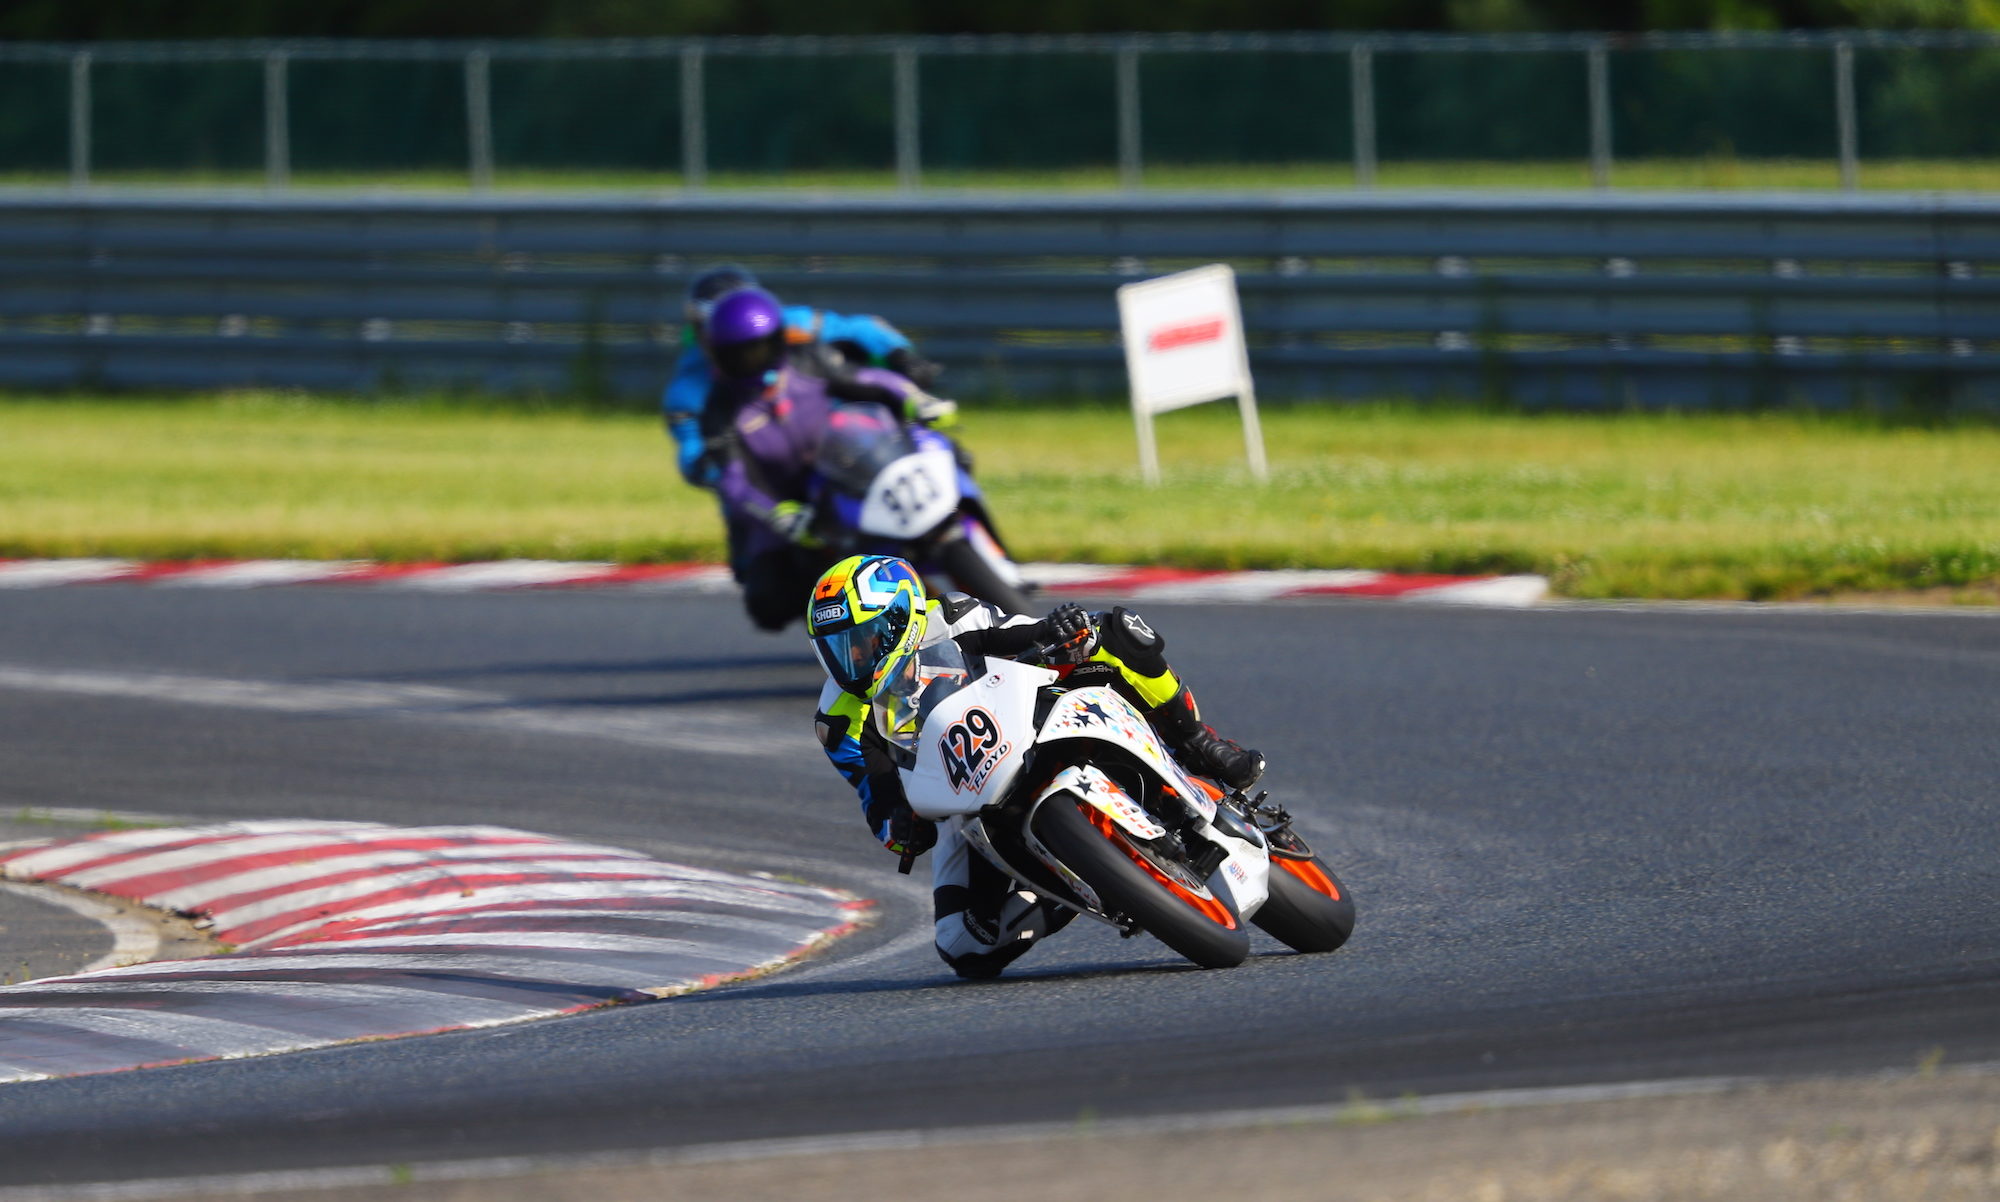
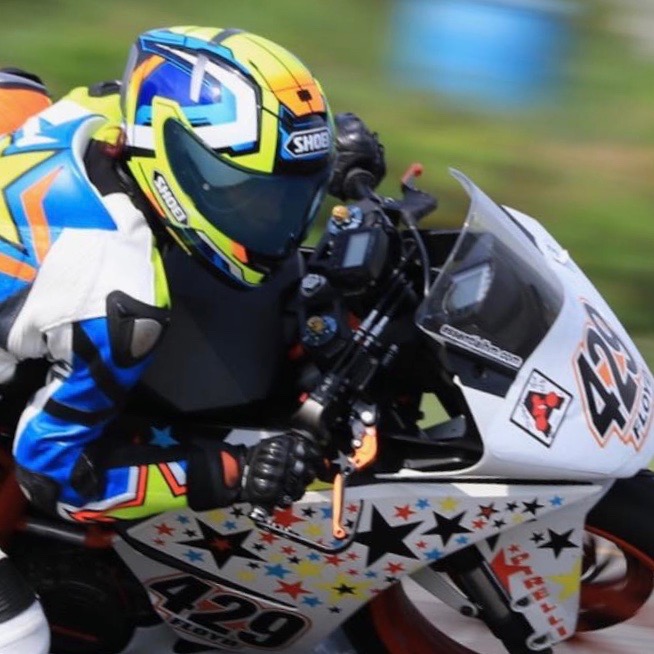
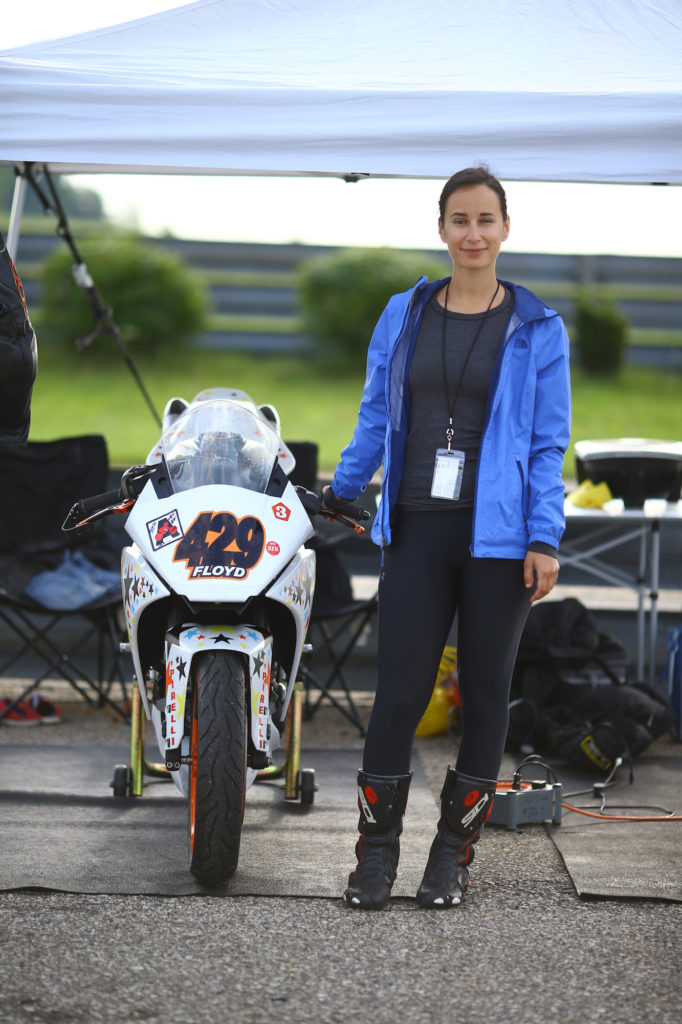
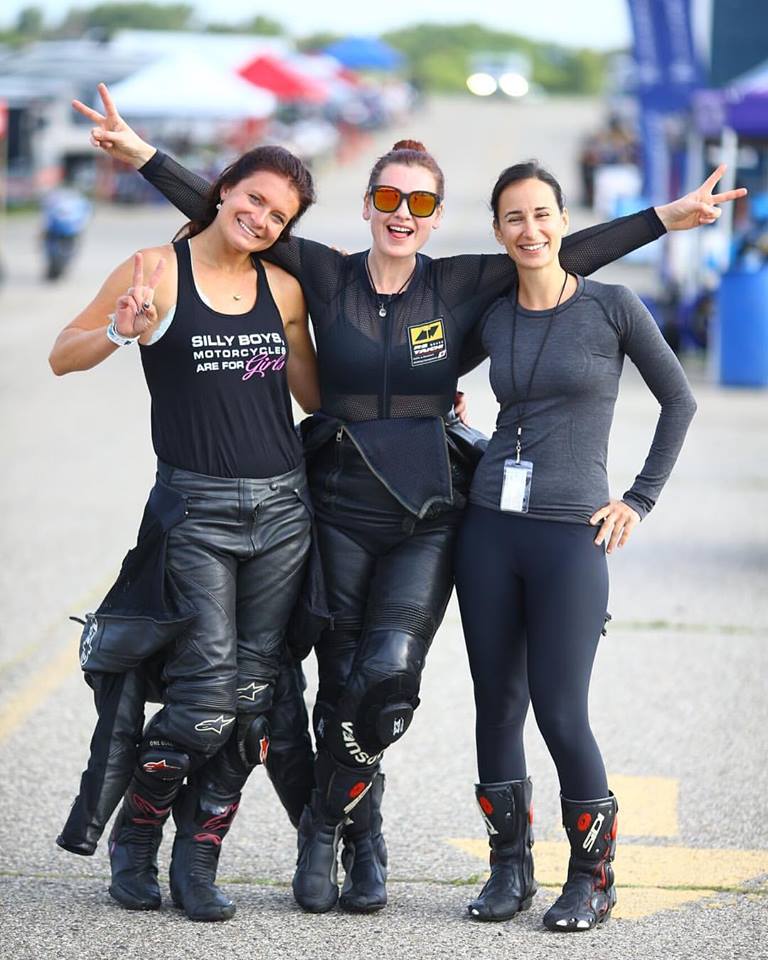
Stephany Floyd. KTM RC390.
HUGE thanks to Essential Healing and Massage and Somnium Massage for the sponsorship!!
Thank you so much.
Recoloring damaged race leathers is pretty simple.
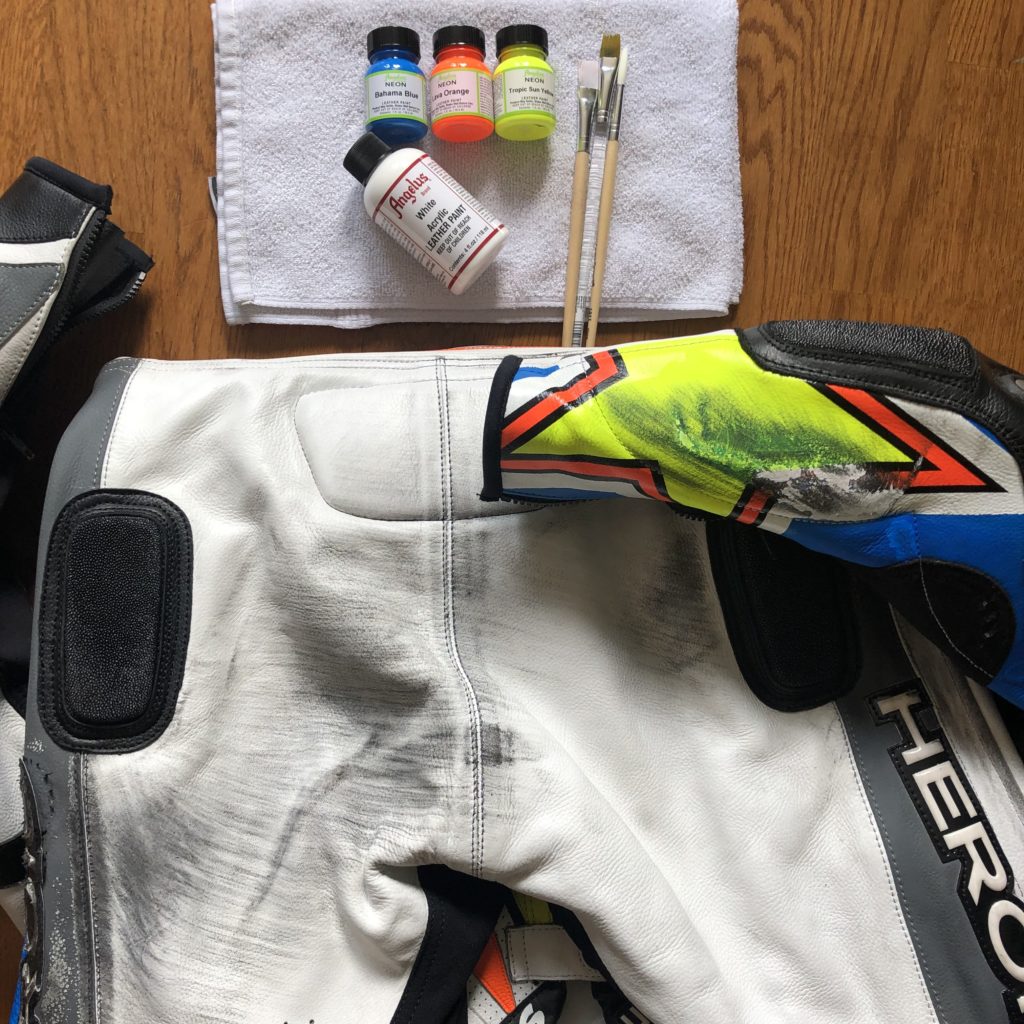
Step 1: Color match your leather paint to the best of your ability. I used white, black, neon Tropic Sun Yellow, neon Lava Orange, and neon Bahama Blue. For the dark gray parts of my suit that were damaged, I decided to be a little cheap and mix the black and white paint until I got a match. I’m pretty lucky that a local art store has a good selection of leather paint, so I was able to see the colors in person. The smaller 1 oz bottles are about $3, the bigger 4 oz bottles are about $6. It’s highly unlikely that you will go through an entire 1 oz bottle of paint unless you’re recoloring the entire suit- this paint lasts a long time, and it’s tough.
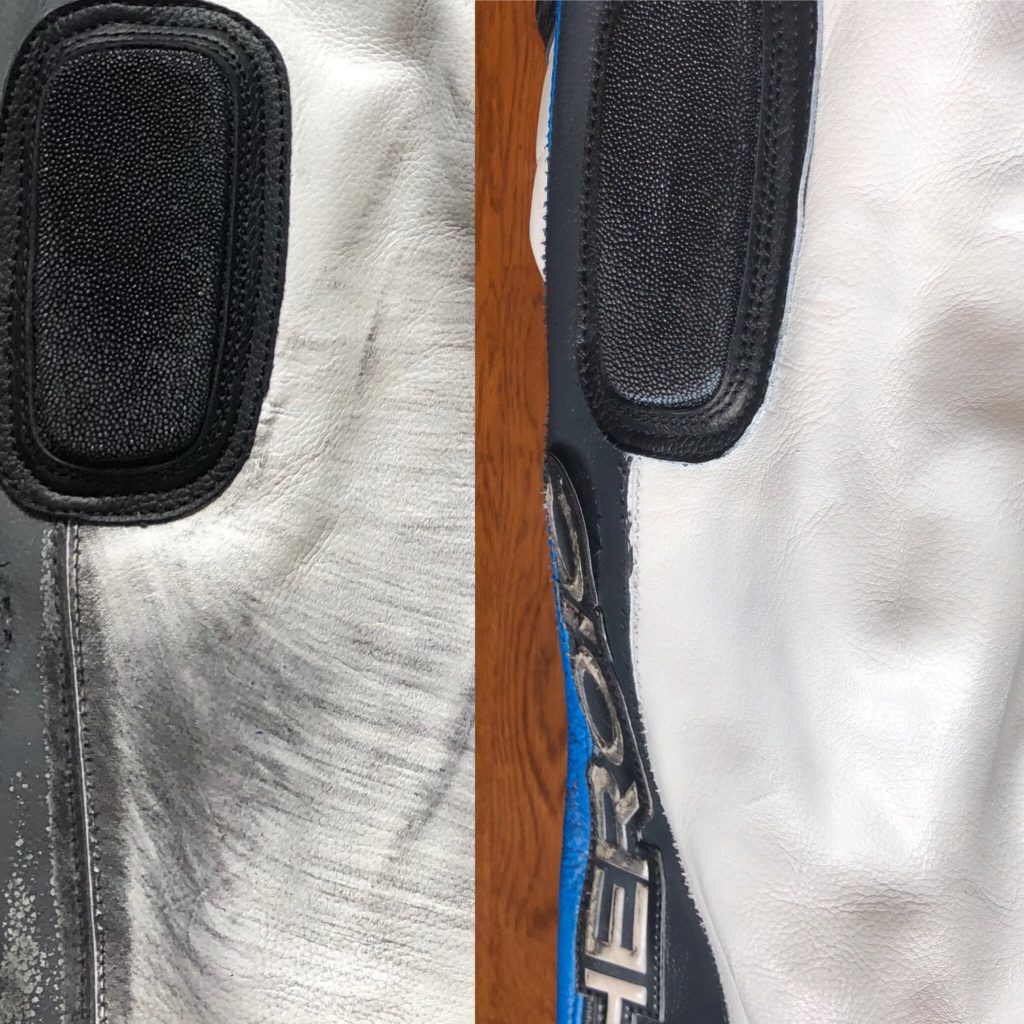
Step 2: Clean all the damaged parts of your leather.
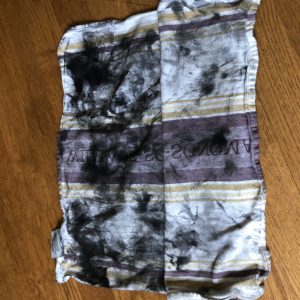
Tar is gross- I used Goo Gone to get the tar off, then washed off the Goo Gone residue with soap and water to get a nice clean base. This is how much tar came off the seat of my leathers after a crash!
Step 3: Prep the area
If you don’t have any other damage to your leathers, feel free to clean and wipe the leather with rubbing alcohol or acetone to remove oils that have built up. Most commercial race suits have a clear protectant sprayed over the colors as well; the alcohol helps remove some of the clear coat. Once that is done, begin masking. Larger areas of damage don’t necessarily need to be masked off, but smaller areas and patterns may need to be protected.
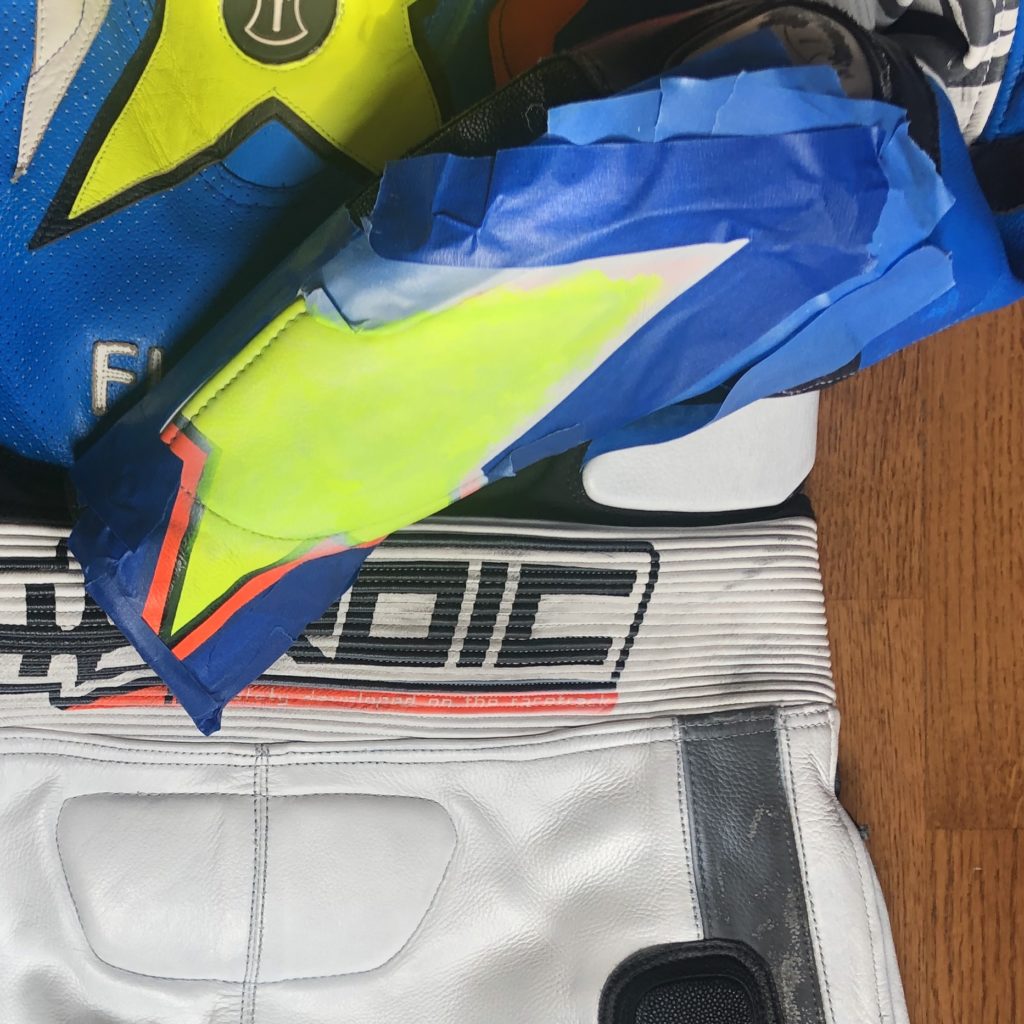
For the star, I had multiple colors that needed to be layered in a specific order and required multiple removal/masking steps.
Step 3: Paint!
Use a multiple thin coats of paint over the damaged areas and let those coats dry between sessions. I used slightly watered-down paint and a hair dryer to speed up the process.
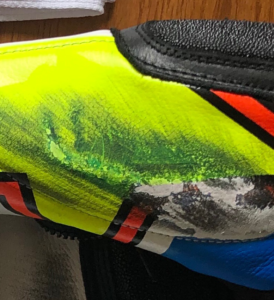
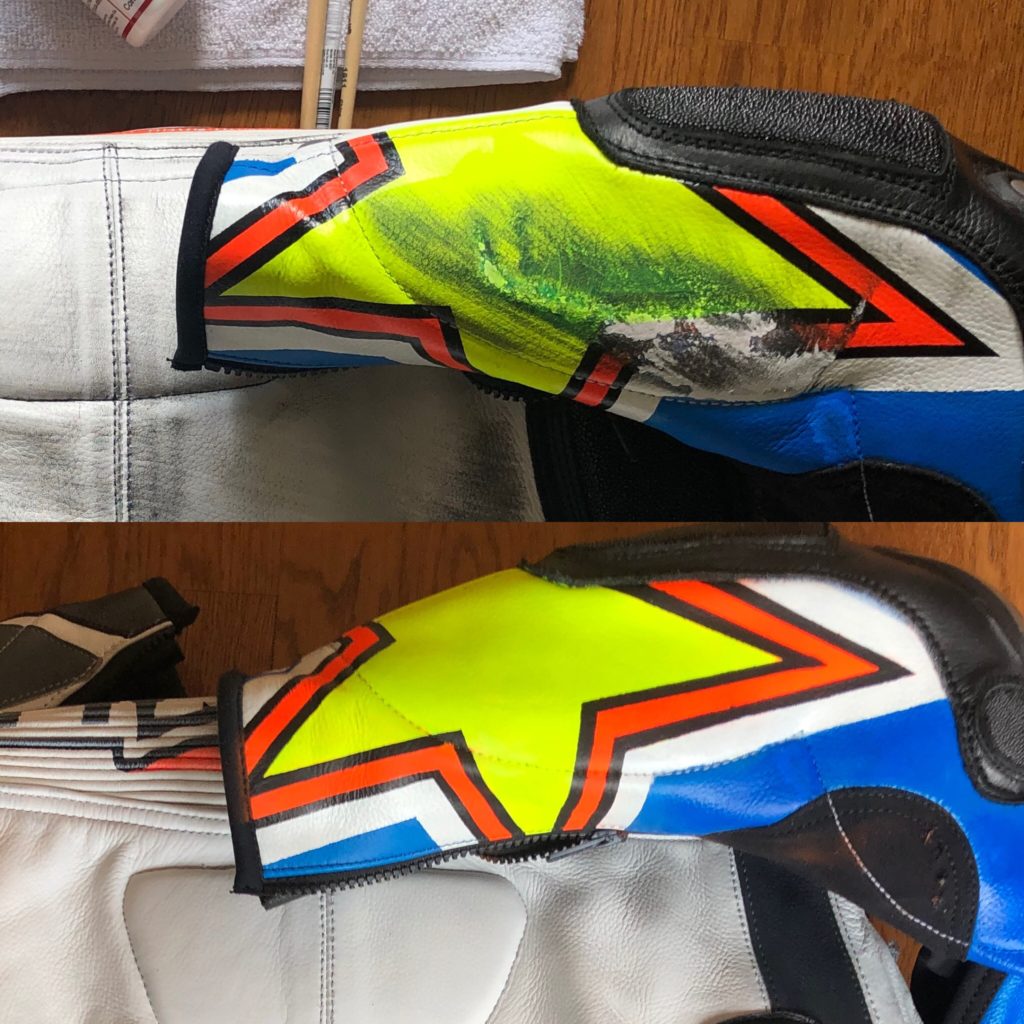
To recolor the damaged star pattern on my suit’s arm, I also had to (LIGHTLY) sand the edges of the damaged paint that were peeling up first. This pattern had multiple layers of different colored paint on it and was pretty thick, so that’s why I chose to sand it. This could also be achieved with multiple swipes of acetone or alcohol if the previous paint pattern wasn’t as thick.
If you have a bright color to paint: first layer white paint! Layer enough to give a good bright base to the area, then paint again in the bright color. Think about the color layers of your pattern, if you have one.
If you have a dark color to paint: go to town, but still use thin coats of paint.
It’s better to use less paint rather than more paint. Think Thin, using the layers to build up color. Take your time. 🙂
This is how the star was recolored:
First, white over everything that was damaged; dry it with hair dryer. Then mask off the parts that need to stay white so that it’s protected. Then neon yellow in the star center; dry it with a hair dryer. (I knew that I didn’t need to be extremely precise with the neon yellow because any ugly edges were going to be covered up by the other colors). Then mask off the parts that need to stay yellow, keeping the white parts masked as well. Then the neon orange; dry it with a hair dryer. Remove all the existing masking, and carefully mask again for the black outlines of the star. Paint the black outline; dry with a hair dryer.
Step 5: Protect
Give your leathers the same protectant and shine as the factory did. Neutral leather paint dries clear, and if you hate gloss you can always buy the matte version.
Step 6: Enjoy the fruits of your labor
I can see a few spots that I messed up because I didn’t mask well enough initially, but I’m otherwise very pleased with how the most damaged portions turned out.
Thank you so much for being the first official sponsor, Somnium Massage!
I’m gonna be soooo matchyyyyy….. next year.
At NJMP with AHRMA, I got measured for a custom race suit by Todd at Heroic Racing Apparel.
Todd was one of the vendors at the race event, and I’d seen his posts on some forums about making/selling custom gloves and boots. I hadn’t logged in to any of those forums in a while, so I guess I hadn’t realized that he was making full race suits as well. The gloves had gone over well with the people who’d bought them, so I decided to go all-in and buy a suit.
Let me back up a little bit:
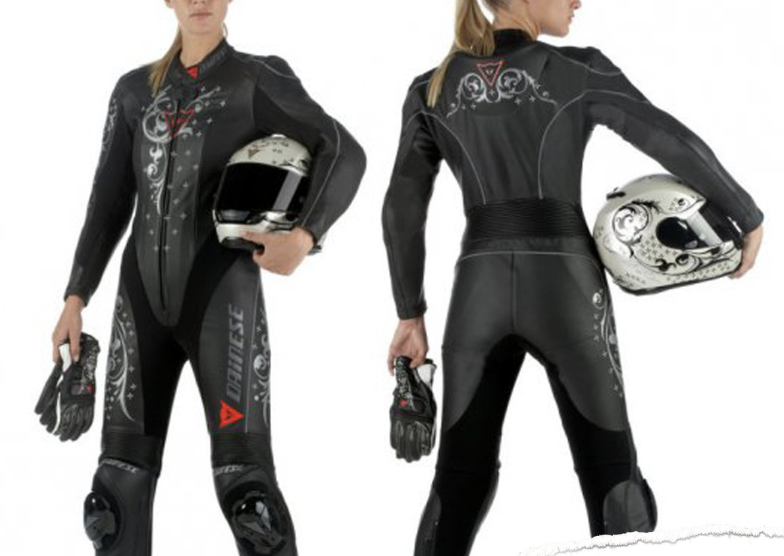
One of my biggest issues with clothing in general is that I have a longer torso than most people do, and shorter legs. I have an ‘athletic’ body type, which is another way of saying I have small boobs, a moderately flat belly, and somewhat muscular legs. Dresses fit a little awkwardly sometimes, especially when they’re obviously meant for a woman with much bigger chest than I came equipped with. As far as race leathers go, it took me a long time to find a manufacturer that sorta fit my body type- I went through Alpinestars, RevIt, and finally found Dainese suits that seemed to fit me.
BUT WAIT: only older models of the Dainese womens’ suits fit me. They changed the way they cut their suits at some point, and everything got really weird.
What this meant is that I would hunt online via eBay/Craigslist/forums for one specific model of Dainese women’s suit (Dainese Yu), despite the fact that it wasn’t produced anymore.
I had a cream-colored suit to start with.
Then I gained a little weight in my legs and booty (SQUATS!), so I decided to size up. I tried a newer model of Dainese suit at this point, realized how terribly it fit me, and found a larger size of the suit I had worn before. Unfortunately, I could only find it in black.
Aside: Did you know you can paint leather? With leather paint? Minor customizations are pretty easy
BLACK. Black is HOT. It absorbs the heat, and this suit was not perforated. I was DYING TO DEATH in my black, non-breathable leathers in the hottest days of summer.
And it was after feeling like I was about to pass out that I came across Todd’s tent at NJMP, and I decided that I wanted to wear something that fit me perfectly.
The process was quick and painless, but make sure you have strong legs: while standing up, hold a race tuck with your back protector and chest protector on, and let Todd measure your arms, legs, torso, and neck. While you’re there, you’ll go over details of the different types of suits, the different options, maybe you’ll pet the cute pitbull chillin’ in the corner, maybe chat with Todd’s wife Theresa.
I chose a HEROIC Custom Stage I – Cow Suit at $1650, and decided to add a HEROIC Genesis Mid-section Mobility Package (remove all the leather in the mid section and replace with stretch Schoeller Kevlar) for another $250. I have a back protector and chest protector… I wanted to be able to rotate my body into the turn, and do it comfortably.
We’ve gone over several design iterations based on my color preferences, and the theme of my bike. (I guess I’m locked into a stars motif now!)

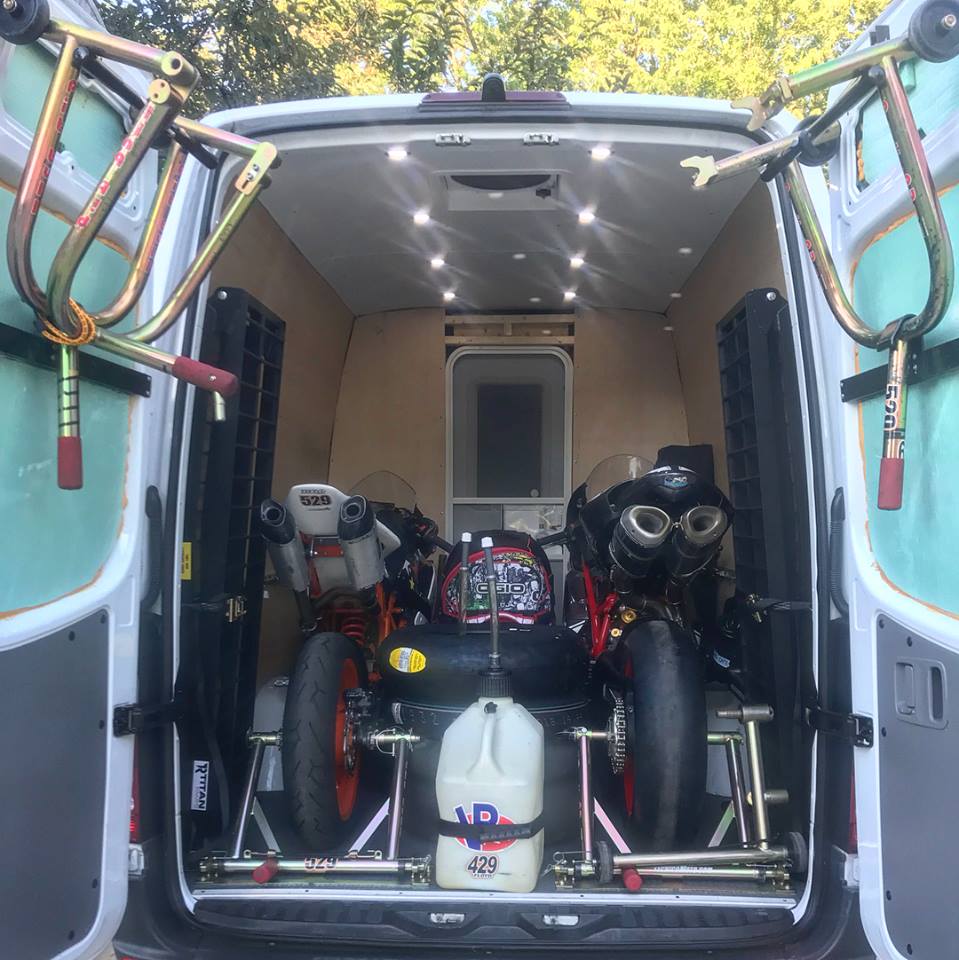
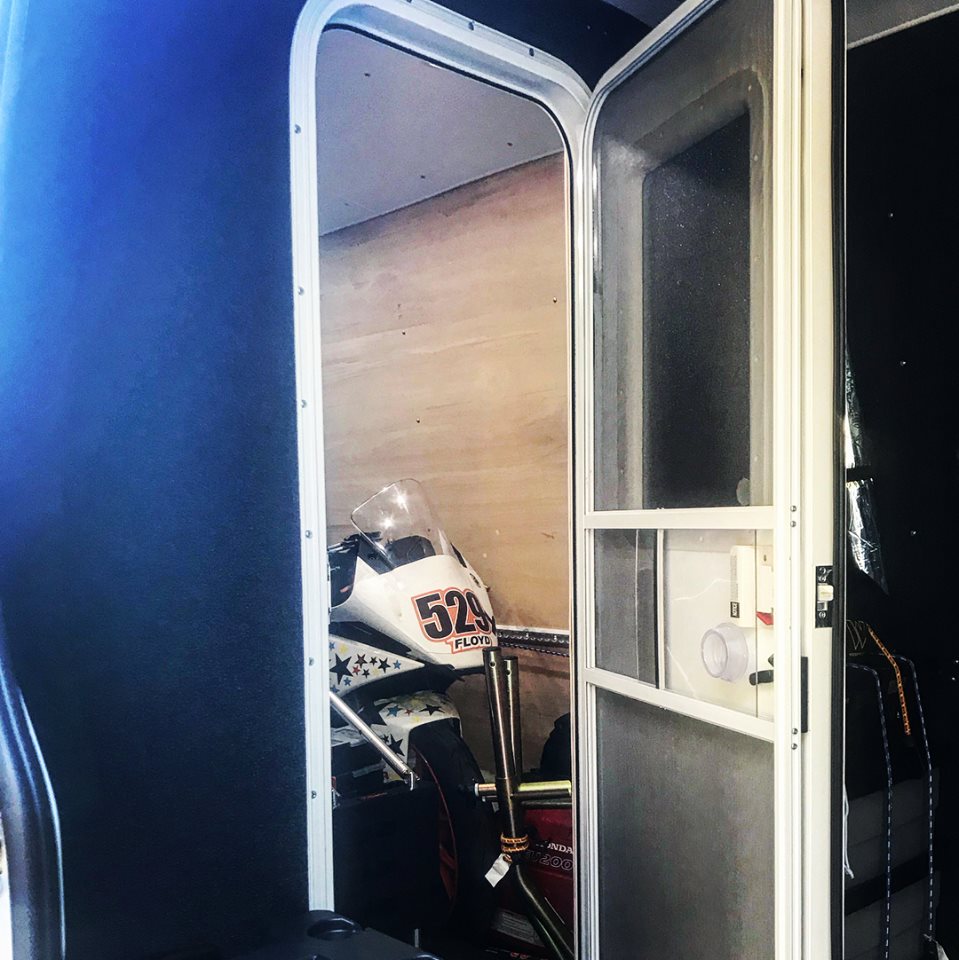
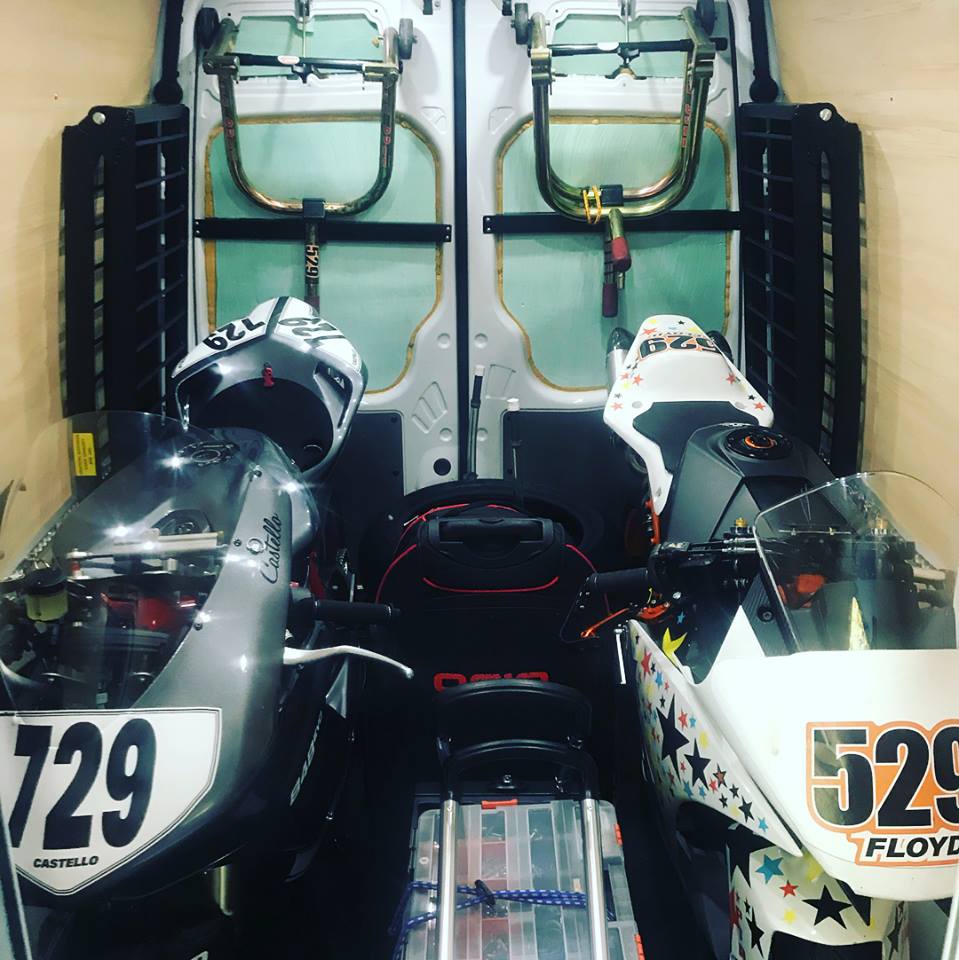
Tecnicomoto’s been working SO HARD to get the race van ready. This is the culmination of nearly 4 months of weekend work to get the sprinter van in shape for its first cross-country trip to New Jersey.
It’s not quite done yet, but it’s a great start to our #racevanlife.
From the original unmodified sprinter van:
You know how you have all winter to do something, but somehow forget to get it done until spring? That happened to me. (Well, also buying a bunch of presents for Tecnicomoto’s niece and nephew.)
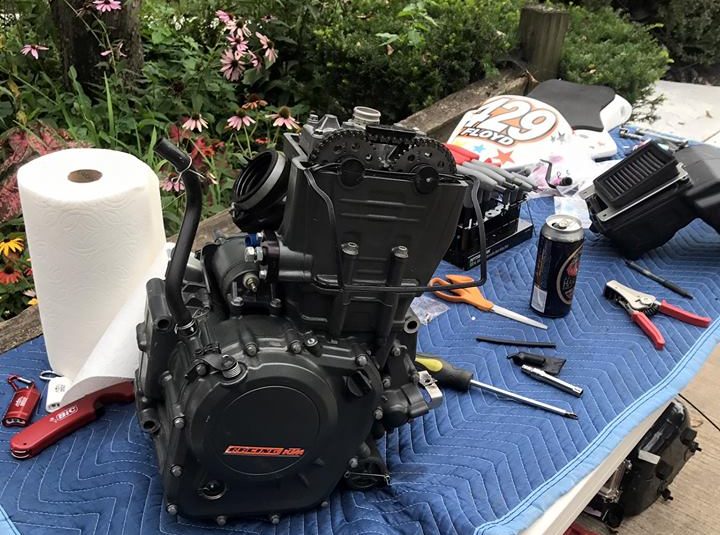
What that really boils down to is that the cylinder work that needed to be done on Gunther was put off until spring when I had an entire winter to do it.
Let me back up a bit: at the end of 2017, Tecnicomoto had to do a bunch of motor work on Gunther. While that got the bike running for my next race, there were small puffs of smoke escaping every time I shifted. Tecnicomoto thought it was likely because the piston rings weren’t seated properly, which would be because the stock piston went back into the bike after it had already been running the race piston.
I waited until March to get this done, assuming I had plenty of time before my races in June. Before sending anything anywhere, we’d called and confirmed the expected turnaround time. Millenium Technologies (a machine shop in Milwaukee) was the final choice, mostly because it was close by and we could drive from Chicago to Milwaukee if we needed to pick it up or drop it off.
Turnaround time is supposed to be 2 to 3 weeks… we’ll see how it goes. If it takes much longer than that, I’ll be on vacation in Spain.
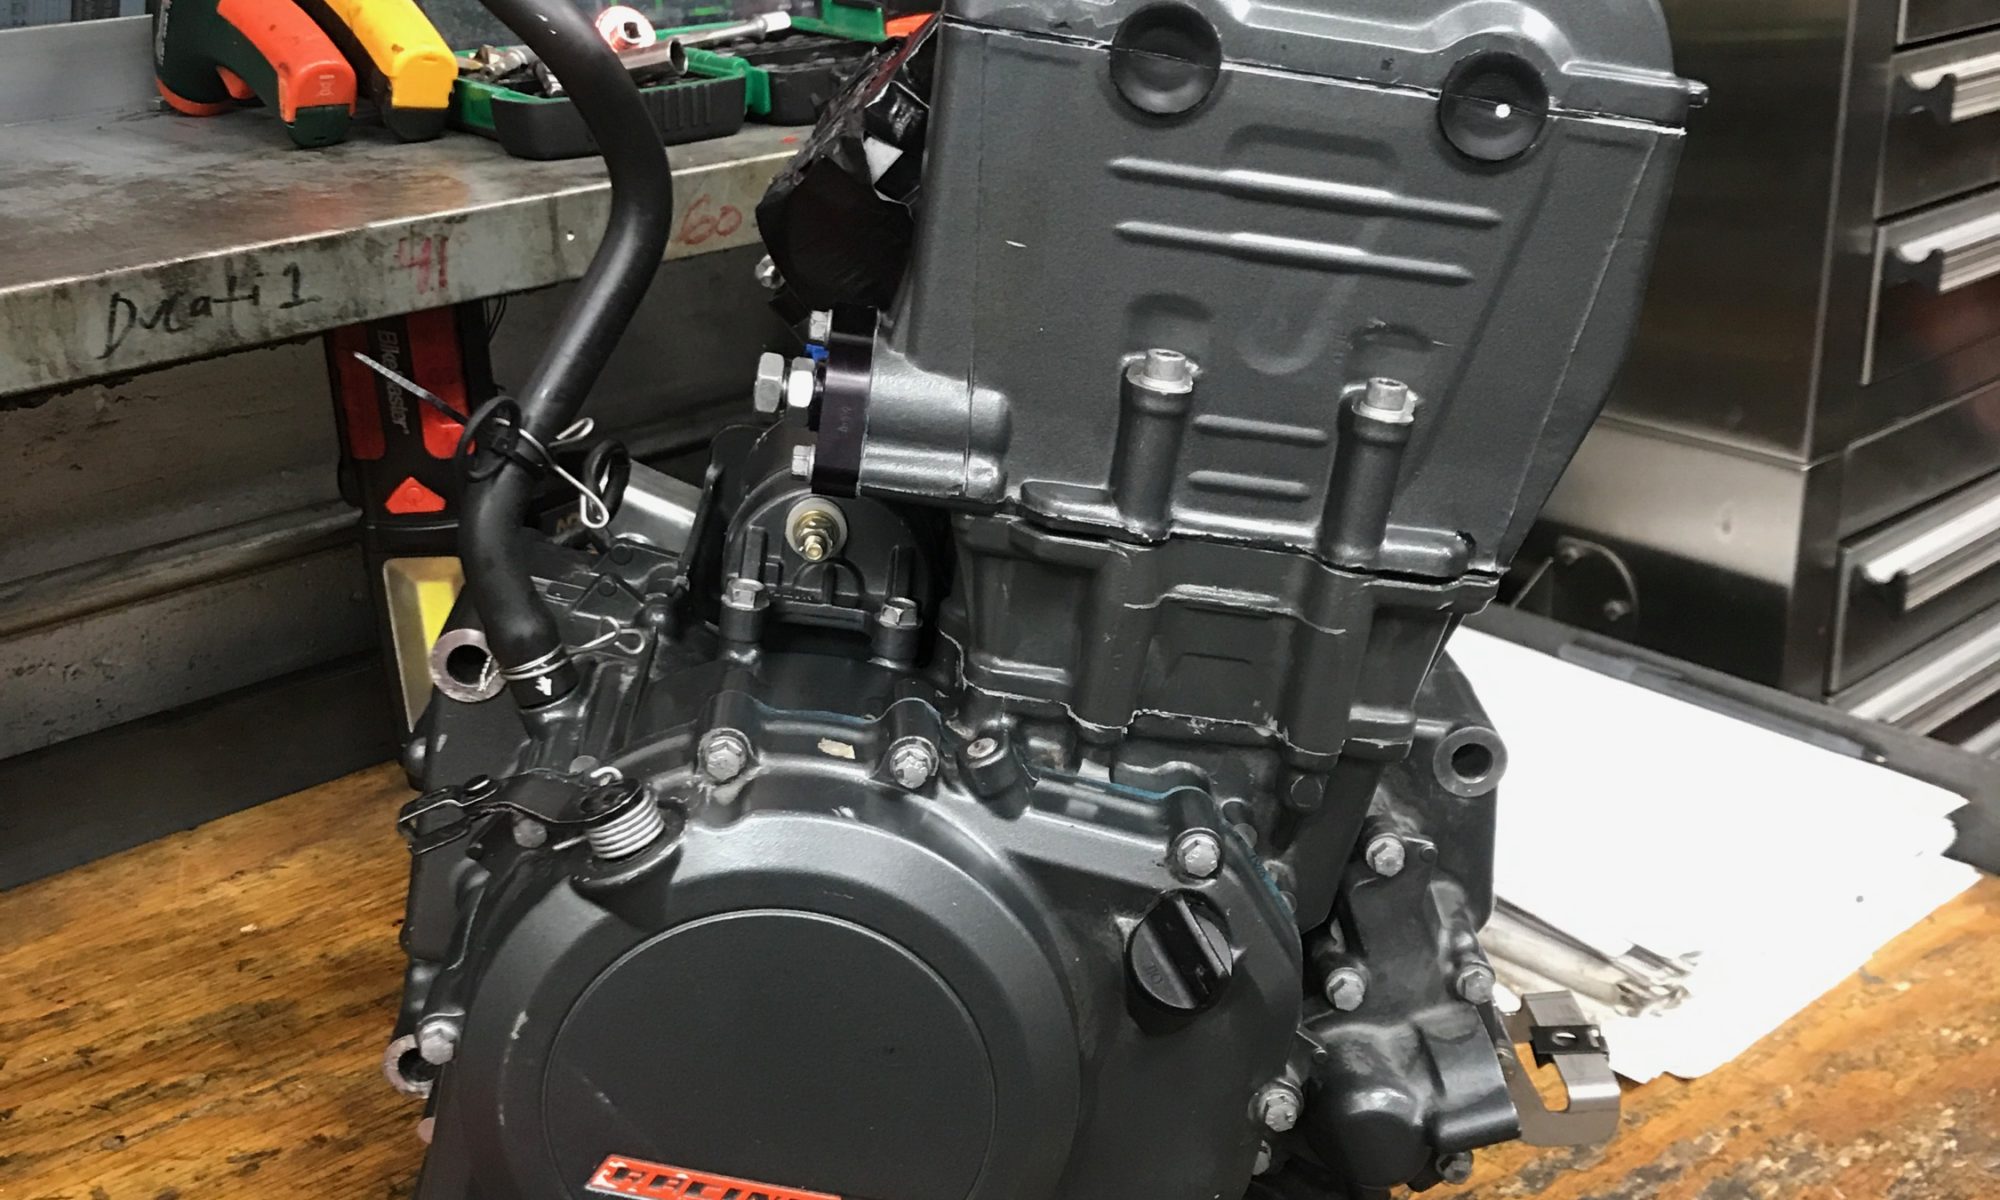
Aaaand just like that, *snaps fingers*, after hard work (not mine), freezing, blowtorching, smashing, and a lot of annoying knuckle-scrapes later, Gunther is (sort of) alive again!

Tecnicomoto is pretty damn awesome.
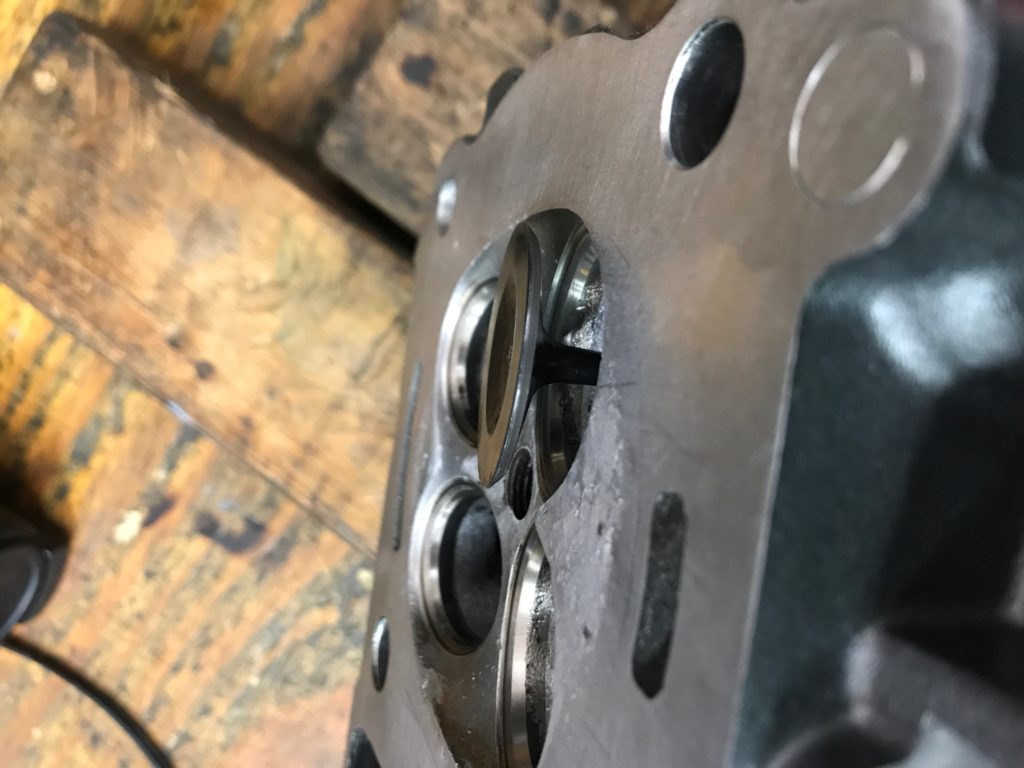
To recap: One of the valves in Gunther smashed. Despite all the badd stuff that a chunk of pinky-nail-sized metal could do inside an engine, there wasn’t much damage to the motor internals. Then we discovered that the shattered valve had also broken its valve guide, which is a really strange piece to break. To quote Wikipedia,
A valve guide is a cylindrical piece of metal, pressed or integrally cast into the cylinder head, with the valve reciprocating inside it. Guides also serve to conduct heat from the combustion process out from the exhaust valve and into the cylinder head where it may be taken up by the cooling system.
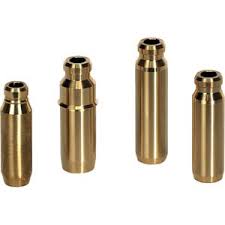
After all the parts & tools arrived (fancy valve guide hand-reamer that looks like a simple drill bit but costs $60, I’m looking at you), he managed to get Gunther fully together and running in a single day.
To clarify:
* He worked on Gunther before work, removing the existing valve guides and prepping new valve guides by freezing them to make the metal contract.
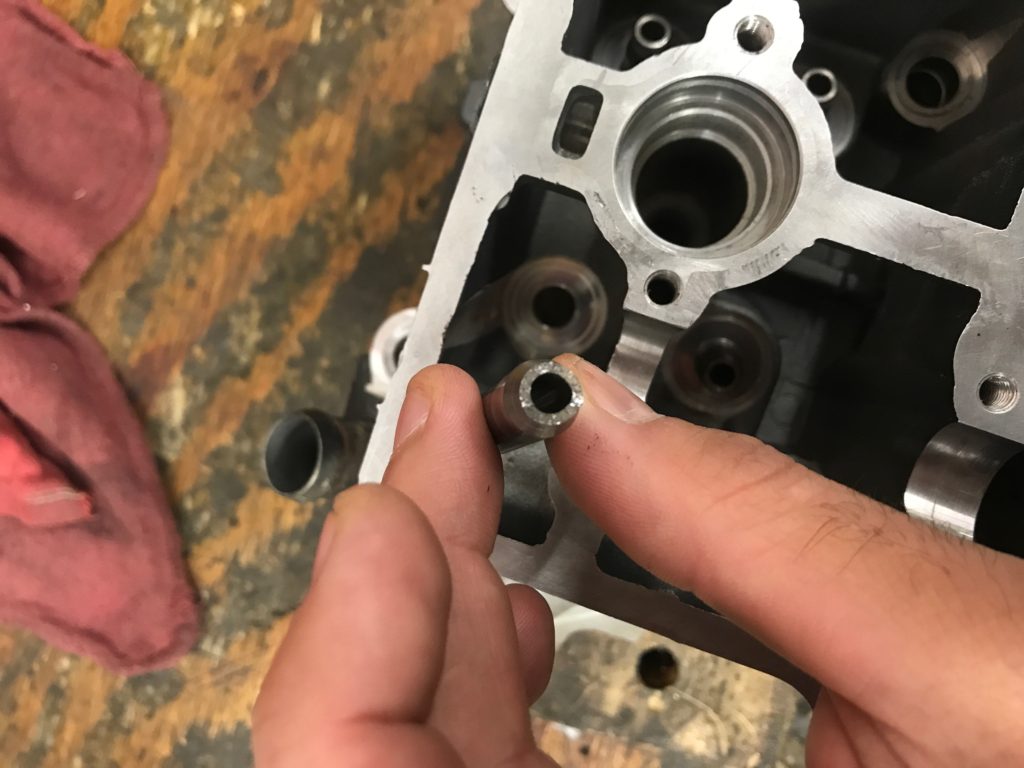
* He worked on Gunther during lunch, torching the block to make the metal expand and then smashing the valve guides into the engine block with a valve guide tool and a hammer.
* He stayed late at work reassembling EVERYTHING.

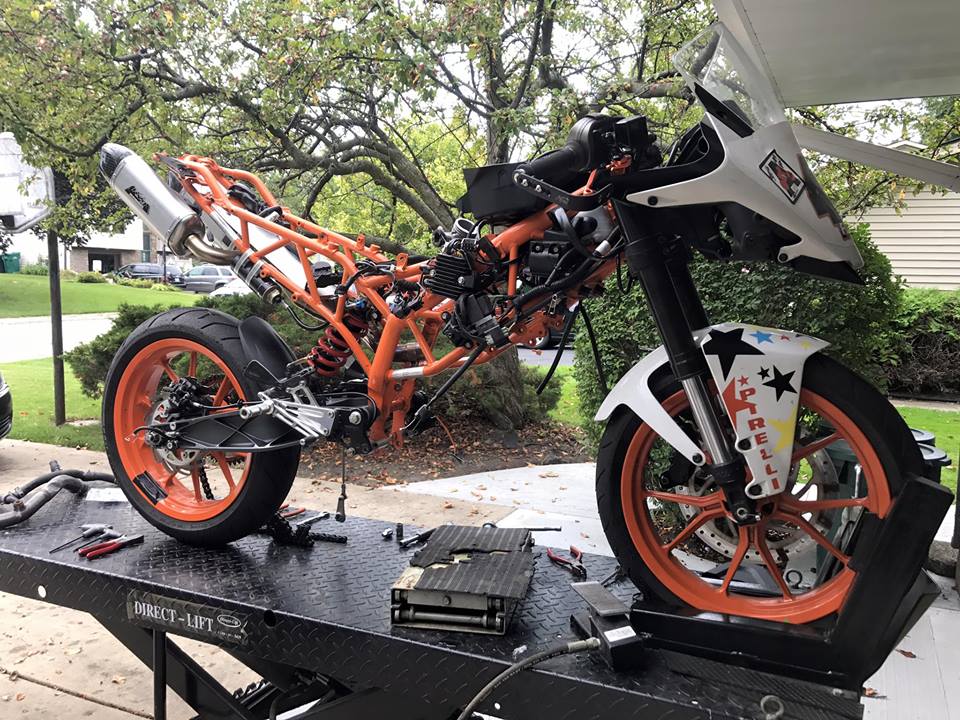
Now we just need to put the motor back in the frame.
And clean up the wiring.
And safety wire everything.
Oh, and stickers. I bought some more visible race numbers, so I’m putting those on also.
Mayyyybe returning the fuel injector back to stock? We’ll see how it goes.
We leave for Talladega in 8 days…
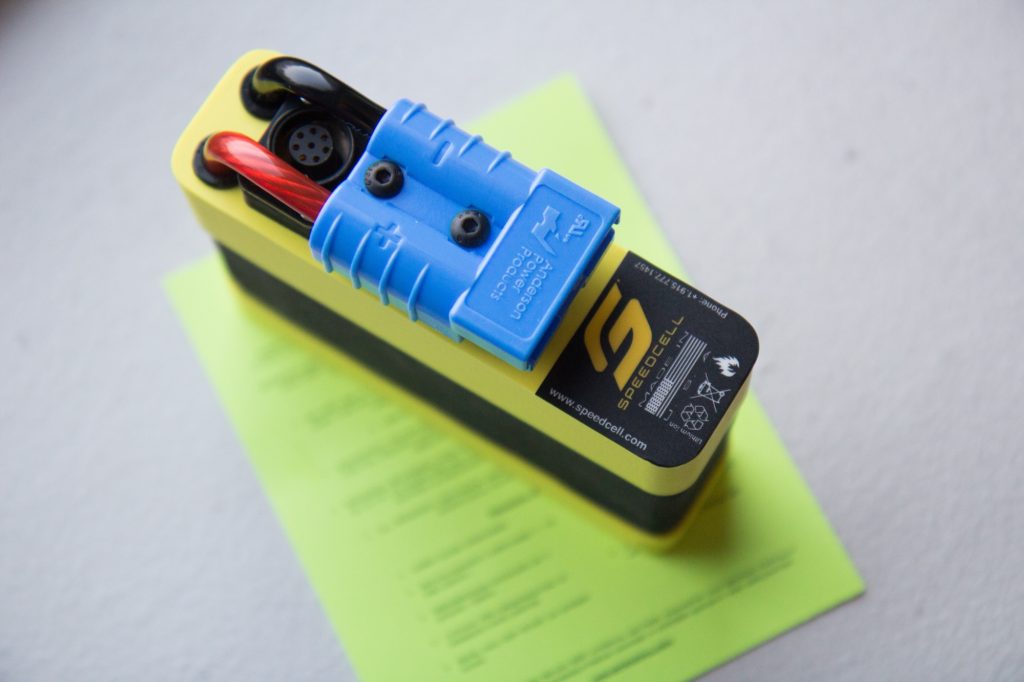
It’s going to take more than a battery to fix Gunther.
In high hopes of it only being a battery issue, I did pick up a really cool new one to replace the sketchy one that was in there from when I bought the bike. This Speedcell battery is 1.2 lbs! The previous battery was 4 D-Cell batteries soldered to plates and wrapped in heat protectant + foam with a universal connector attached. Technically, I’ve gained 2 ounces… but the peace of mind is worth it.
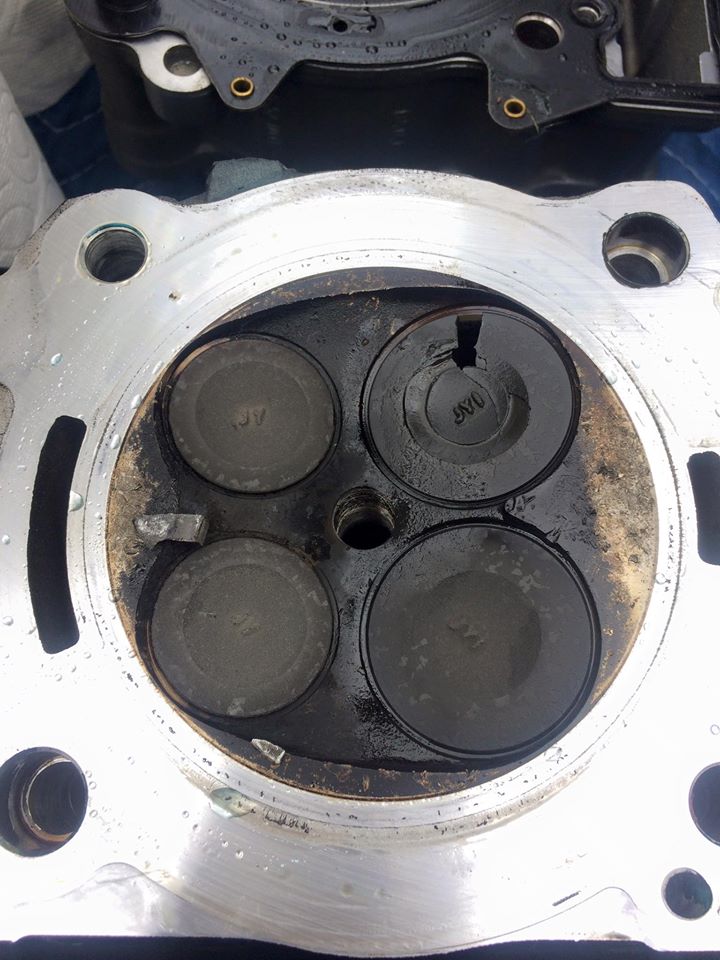
Gunther has a broken valve.
The valve isn’t bent, which means that I didn’t do it, but I still feel bad about breaking my bike. And generating a lot more work for tecnicomoto three weeks before we leave for Talladega.
Currently, this is what my cute ‘lil KTM looks like:
And the parts list, after tecnicomoto dug around and discovered that the floating chunk of metal did less damage than we thought:
intake cam
rocker arm
intake valve
gasket set
piston (I have the stock one as a spare, at least.)
valve set
valve guide
gaskets
seals
c-clips
o-rings
valve guide tool
spark plug
…and a ton of labor. Not just the manual labor, but also the labor of research & price comparison for parts.
While we’re in there ripping Gunny’s guts out, tecnicomoto wants to clean up the wiring harness that has been bothering him since I claimed ownership, and take care of the coolant overflow reservoir that sprays coolant on me as I ride.
Total parts cost: about $350
Time spent… lots. And this is just the beginning.
Hopefully the parts will arrive by next week and we can replace everything, then get the bike on a dyno to update the fuel map to accommodate the new, cheaper, less racey parts.
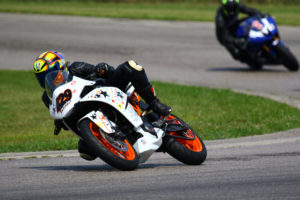
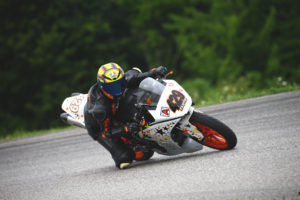
On Monday, I went to a track day at Gingerman. It happens to be the end-of-season “Trackfest” for the midwest sportbike tracktime. Immediately after that weekend is the “Johnny Moto Day”, a dealership (Motoworks Chicago) sponsored event. Gunther and I did great!
I got knee down in turns I’d never gotten knee down in before- the left turns, 8 and 9. That means that I picked up my pace, yay!! Maybe next time I’ll bring a lap timer that I can use. I got a cool one for tecnicomoto for his birthday, but still don’t have one for myself.
During my last session of the day, as I was accelerating out of the blend line to get to Turn 3, Gunther died. I still had electrical power, but no motor movement. And since that’s a really really bad thing to have on a racetrack when there are possibly people behind you that don’t know you can’t move, I got the hell off the race line and hung out for the rest of the session in some weeds.
Ultimately, two other people crashed in that session. The track only had a one-vehicle carrying capacity for its crash truck, so I would have been the last pickup due to my issue being mechanical. Instead, a friendly corner worker helped me push the bike all the way back to our pit. In the full punishing, sunshiny, 85* heat. (Way to go above and beyond, GMan corner worker dude!)
Later this week, we’ll take Gunny apart and see what the damage is. Hopefully, it’s something simple.
Got some new (used) leathers, sold the other (also new) leathers, sold the (used, crashed) leathers.
At one point, I had approximately $1800 in leather suits hanging up in my house. I originally had a set of off-white Dainese leathers that I crashed in. I decided to upgrade to a new-new set that was a little larger, since I added a back & chest protector to my ensemble.
After riding at Carolina, I felt like the new-new Dainese Racing Lady suit in a sz 46 was choking me.
I was able to find a used (nearly new) condition Dainese Yu suit for sale in a sz 46, in black. Then I found a local buyer for the new-new leathers that didn’t fit. And then someone bought my crashed leathers on eBay! All of this leather selling happened within a week- I was totally expecting those crashed leathers to sit on eBay for months!
Also, did you know that there’s such a thing as leather paint?
Angelus Leather Paint: meant for shoes, so it’s pretty tough. Also comes in a rainbow of colors and happens to be in stock at my local (10-minute walk) art supply store.
I didn’t like the red/black/gray color scheme going on when I purchased my new-used leathers. So I changed them. I made them more… KTMish. I’m very matchy-matchy now. Squeeee!
Before & After:
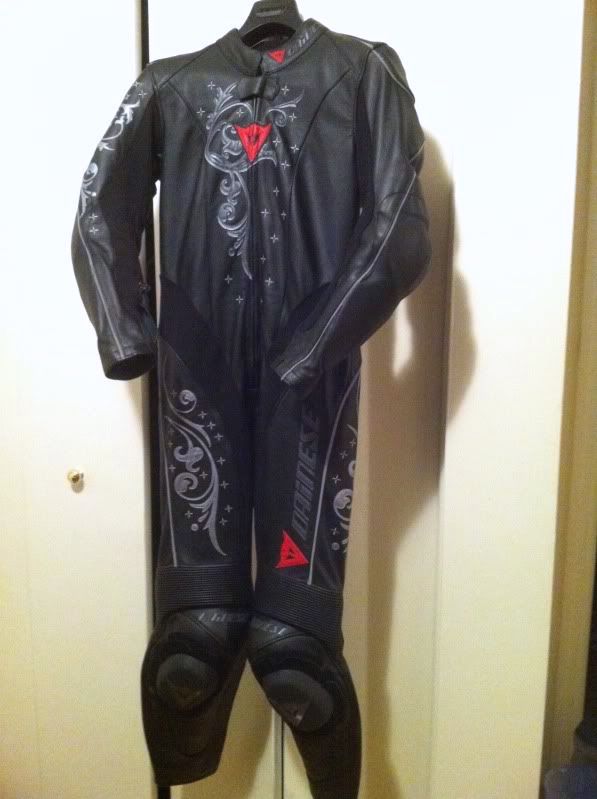
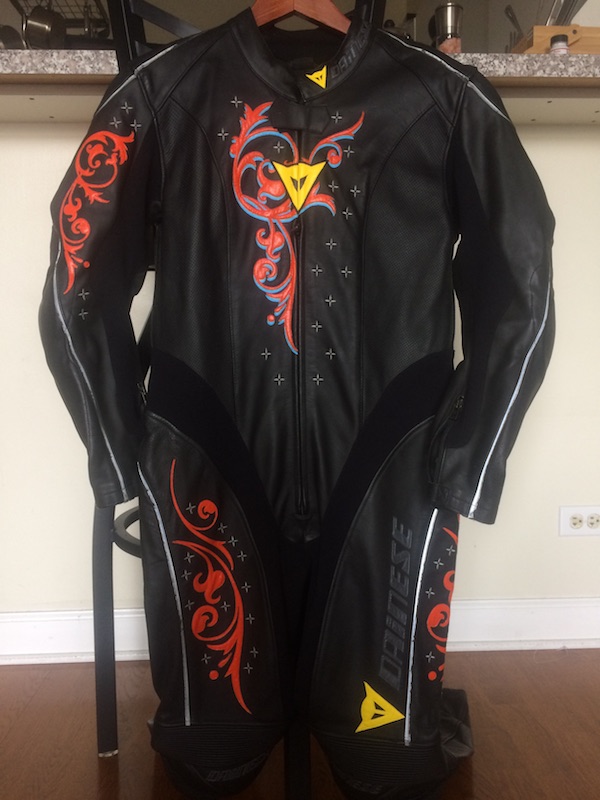
I think I’m going to tweak it a little more, but it’s pretty close to done.